Thursday, April 26, 2012

SxS Mini Project 2: Thread Drawing

I do not own an embroidery capable sewing machine.


But wow!  Now I don't need one.

This is a freehand drawing of birds (I like birds) on a blue background.  You can use anything, make up any design and use any stitch to "draw" it on the fabric.  Mine is very small (around 6" x 8" but it will be a pillow, eventually) but the technique can easily be modified to make something larger.  Ooo, imagine quilts with embroidered center blocks!

Practical application of the stitch sampler- I was able to decide which stitches to use for different parts based on what I knew they looked like, picking different widths and lengths to create texture.  Once I've washed it and sewed on the back it'll look neat on my couch.  Hooray, home decor in a snap!

Monday, April 23, 2012

SxS Mini Project 1: My Stitch Sampler

People who embroider make samplers; whoever would have thought that a sewing sampler would be useful?
Pardon the glare, darn camera . . .
This is my sampler- a large piece of fabric sewed with every stitch available on my machine, in different widths so I can see how it works.  How amazing is that!  My plan is to frame it and put it on the wall above where the sewing machine lives so I can always see what it does.  Isn't practical wall art great!

Ready to get the book yet?  Its fantastic!

The Journey:

Yesterday morning I was totally going to start my sampler when the unexpected happened:

Yes, that is my sewing machine minus the back panel.  Why?  A spider.  Not a tiny one, oh no, half-inch long and yellow.  Scared the devil out of me.  I always have had trouble with spiders in this house, but usually NOT in my sewing machine, so I attacked it with a can of air.  Haven't found the spider but if it is still in there it ought to be terrified!  I did learn two really neat things about my sewing machine though: there is a lever to lower the feed dogs that is impossible to see when the machine is assembled and there is one tiny nut that will fall inside one you have put all the screws back in so you have to take it apart.  Again.
Luckily that didn't take a lot of time (practice makes perfect, grrr), so only an hour after I intended to start I actually started.

I enjoyed learning about the different stitches (which you can see across the top of the machine) and figuring out what they looked like.  I still don't know what most of the do, but some look pretty neat as they are.

Close up shots of my favorites, please ignore the glare.  Sometimes my camera gets up in a bad mood.


The curve reminds me of a banner and there are a few that look like heartbeat monitors.  The zigzags (right) look a little like leaves.  Absolutely a neat way to learn about your machine!

Saturday, April 21, 2012

Stitch by Stitch - Part 1

If no one else has a nominee for easiest book to follow then I do- read through the entire first part last night and have been impatient to start on the first mini project!

The book is divided into Parts, then Chapters.  Part 1: Getting Started has three chapters: Tools and Materials, You and Your Machine, and Fabric.  Most of the materials are things I had on-hand and a few I have never even heard of but Ms. Moebes gives very detailed descriptions and uses for each item on the list and even includes things that are helpful but not at all necessary (like tube turners, for example, instead of using a safety pin or a needle).  She goes on to explain the different parts of sewing machines (with illustrations) and explains fabric in a detail I have never seen.  For the first time, I understand what the nap of a fabric is.

Throughout the different sections, Ms. Moebes gives sound advise for people who are beginning, returning, or experienced sewers.  Like the introduction, the first part is full of humor and wisdom, chiding people to not let their machines rule them and explaining why it is important to cut a straight edge!

Feeling inspired and itching to start my projects, I decided it was time to dig through my fabric box.  Sadly I didn't take pictures, but it may be a good thing that no one but me got to see the mess!  That fabric box has traveled with me since high school (so around 10 years!) and I never bothered to keep tags on the material.  Intelligent idiot young me thought, "Surely I'll remember!"  Ha.

Two hours later and my box is sorted into groups: cottons, denim (yes, I know its cotton too but its heavier so I separate them), fleece, flannel, satins, knits, and misc.  Most of the miscellaneous bag is full of costume materials, for dolls so the pieces are fairly small.  I love cloth dolls and making doll clothes for barbies and 18" dolls, generally period specific.  There are so many neat clothing syles out there and making a dress for me takes a lot longer.  Plus, the dolls don't complain about corsets!

Once the box was organized, I overhauled my sewing supplies and sorted out what will be my "Basic Sewing Supplies" as Ms. Moebes deems the kit in her book.  I put them into a kaboodle- a real one that used to be a makeup box, but it works great for sewing supplies.


The box contains:
Shears, Scissors, Two sizes of Seam Rippers, and a 45mm Rotary Cutter

Some of these are tools I used when I took my first sewing class in the 8th grade!  And they still work!
White pen, white pencil, yellow chalk pen.


I have a lot of pins- Tpins, safety pins, large ball pins (white) small ball pins (colored), and flatheads.  Along with hand sewing needles and machine needles (not pictured).

And yes, for those of you paying attention, the safety pins and small balls are in dice boxes!  The silly things are amazingly useful and the pins stay inside.  I keep all of mine and anyone else's if they'll let me.


And of course there is measuring stuff.  This is the only tape measure in this box but I have a blue measure in the jewelry making supplies and a purple retractable measure in the knitting supplies too.  Its hard not to have one.  The simple size gauge is in here, along with the bias tape maker, needle threader (I hate threading them myself!), and the hem guide.  The hem guide is new, but amazing- you use it to press a hem before sewing.  The metal guide not only gets hot and helps press the hem into place, it has measurements so you can make sure the hem is the proper width and a curved side for curved hems!


My other new toys are these: a self healing rotary mat and a clear acrylic ruler.  The ruler is great- those funny looking dots are gripping spots so the ruler doesn't slide around on fabric.  They make straight edge cutting so much easier- I've wanted one for years and never got the courage.   The heck with that- I've got 'em and I'll use them.  In fact, as soon as the dryer finishes I'll get to use them for the first mini project: My Stitch Sampler.

Thursday, April 19, 2012

Stitch by Stitch - Introduction

Finally had a chance tonight to read through the introduction of Stitch by Stitch by Deborah Moebes.  Less than 20 pages in and I'm hooked- her writing is humorous and very earthy, both things I adore in someone who wants to teach me something!

In her introduction, Ms. Moebes does something unusual in most of the "How-to" craft books I've read- she talks about the history of sewing and even includes a timeline of important events.  Things such as when the first sewing machine was created (that didn't work!) and when the Singer finally came out.  Her description of why we sew now verses why our ancestors sewed was rather enlightening- instead of being strictly necessary to cover ourselves, sewing can now be a fantastic art form, and it is to anyone with basic internet surfing skills!

She also includes a great questionnaire to help people know where they are coming from.  Seeing as how I'm putting all my sewing fails online (presumably, but I know me and I'm a little klutzy with the sewing machine), I figured I would put mine right here for the world to laugh at:

Sewing History

     Where'd you come from, and what took you so long to get here?
I learned to sew as a child from my aunt and Ms. Jean, who taught me how to quilt.  In junior high I took home economics and learned how to use a sewing machine.  I sewed doll clothes and costumes by hand in high school and bought a sewing machine some years ago but haven't used it to its fullest potential.

     What's been keeping you from sewing? Was it a bad experience?
Nope, nothing bad, just frustration.  Since I never took advanced lessons there are techniques I am not comfortable with and never attempt, mostly finishing hems and using elastic or other complex notions.  Not knowing how and being afraid of screwing it up I have never bothered experimenting.

Inspiration


     Who most inspires you to get creating with needle and thread?
My biggest inspiration comes from the internet.  There are so many things I see (mostly clothing) and say "Oh, I could make that!"

     What gets you itching to use that machine?
Clothing that fits properly!  Being a lady with hips larger than are in vogue it is difficult to find clothes that fit, beyond the fact that most modern clothing is entirely different from styles I favor!

Goals

     What are your sewing goals?
I want to be comfortable enough with all techniques to be able to create any pattern, or any idea, that strikes my fancy.

     List the 3 things you'd like to be able to create by the time you've completed the lessons in this book.
Easy.  A set of ankle length circle skirts, a cover for my mixer, and a bag that will actually hold all of my knitting supplies!

     Let's say time, skill, and money is no object.  What is the one project you most want to create?
I would love to have a tailored suit with multiple pieces: skirt, pants, jacket, and blouse that are all form flattering and long wearing.

Well, at least I have a clear idea of where I'm aiming!

Vacuuming

Does anyone like to vacuum? I don't know anyone who does- it makes your back sore and is so mindlessly repetitive.  I always feel better after vacuuming though!

One of my Christmas presents was a tiny shark vacuum that I haven't opened yet, but I think it may make cleaning a little easier.

The Shark Cordless Floor and Carpet Cleaner


Its pretty neat, but it has to charge for 24 hours before the initial use.  It's using an Ni-Lithium battery so the charging instructions are very specific, but the portability is great.  I have no idea why I never bothered using it, lazy me, but after assembly it weighs less than half of my real vacuum.  It will probably save my back lots of aches, silly me.    I think this is the only time in my life I have every been excited about vacuuming!

Wednesday, April 18, 2012

Woes and Photoshop


Oh, was I naughty yesterday and didn't post- work was simply dreadful.  Being shorthanded and having to do everything yourself while trying to hire and train people is not a fantastic way to spend the day.  Luckily, the interviews today were great and give me hope that work will calm down and I don't have to spend every evening trying to relax and can get back into crafts.  Oh how I miss knitting!

I have discovered a new love this week despite the crazies: Photoshop Touch.  After nearly 3 years in the market the iPad finally has all my picture editing needs.  Yes, I know there are a lot of different photo apps out there, but there wasn't simple one touch editing until iPhoto came out in March and now, at last, Photoshop Touch has added layers, the magic select, the lasso select, and nearly every other trademarked tool they use is available in a fully integrated and simple touchscreen interface.  I heard the rumors, checked the website and finally downloaded it myself because I couldn't believe anything could be that simple if Adobe created it!  I wasn't disappointed.  As soon as the battery is charged I'll throw some pictures up- I keep running it down playing with the images!

If you haven't seen it go check it out; it's only $9.99 on the App Store, an amazing deal considering the full version of Photoshop is generally $699.99!

App Store Link
Adobe Link

Update:
The battery lives!  Here are the images.
The Original Image, a horse I knit for the Man for his birthday.  Cute, huh?
Playing with effects using edge lines.  I love the bag of apples in the background too!
Using layers and random colors in the background, I cut out the horse without a stylus!
I am definitely impressed with PS Touch and will probably be using it more often.  These I did quickly for the site (no people) from a pic I had on the iPad.  It easily does color swaps and simple photo edits in addition to the traditional manipulation we're used to, but I may stick to iPhoto for the simple things and use Photoshop for the complex layers it offers.  Can't wait to see what they'll change in the first update after all the feedback.


Monday, April 16, 2012

Oh Monday . . .

Aren't Mondays wonderful?  They're nature's way of saying "Ha ha, slacker!  You partied all weekend and now you must pay!  Muahahahahaha!"  Only, I didn't party, just cleaned my backroom but nature is not listening.  It's true, women just don't get along that well!

Anywho, many tiny things in an imaginary bucket for you.  My bucket is blue, but you can make it a different color if you like.  (*Note, a delicious chocolate bar was in my fridge 30 minutes ago.  Was.)

Tiny Thing One:  I have added a projects page to the website so I can't get lazy and ignore projects.  I will update it as things are finished or new things are added, hopefully so I can look at it one day and say "Did I really do all of that?!"

Tiny Thing Two:  Forgive my nerd, I laughed hysterically at this:
It would be even better if it were a Squinkie Boba Fett.

Tiny Thing Three:  I have decided that it is now time to go through this book:


I've had it for a while, just sitting on my shelf.  Bought it for several reasons: I was afraid they would sell out and not have any more or if they did I would forget and because my sewing skills are far from polished.

Over time I am hoping to go through every page and work all the projects, but there are some that I might skip.  Once I've finished reading through it I will know more.  Hopefully.

I'm really looking forward to the home decor part, which makes me feel awfully retro-fem, but it still pales compared to the overwhelming joy that sweeps over me when I think "At last, I'll get rid of my fabric stash . . . and get to start again!"


Tiny Thing Four:  A Pinterest link!  Nutzo that I am, I realized I can add a Pinterest "page."  Genius, Blogger, just genius.

Having dumped the bucket out I shall refill it and return anon.  Is your bucket full?  Dump it in the comments and we'll have a party.


Sunday, April 15, 2012

Cast Page Up!

I added a cast page.  It occurred to me that people not familiar with me might read this and wonder "Who the heck is (name of pet)?"  Well, now you know!

Sunday Tradition

As a munchkin, it was my family's tradition to make pancakes on Sunday morning.  Being lazy, I don't make pancakes very often.  The last time I can remember making them was before I moved to Texas over nine years ago! 

Today, that changed.

Oh, delicious diet-cancelling pancakes, how I admire you.  Dripping with syrup and eaten whole ( with unfortunately crispy sausage), you made my morning.  The picky man even ate them and the horribly crispy sausage!

Did you know that the serving size for maple syrup is 1/4 cup?!  I can feel my arteries crying from here.

While I was charcoaling cooking the sausage, I found something that we picked up at the store yesterday and decided to put it up. 

Yes, its a dishwasher indicator.  Since I rinse all my dishes nearly clean before putting them in the dishwasher the man can never tell when they are clean or dirty.  I have been looking for one of these and only struck gold yesterday at the grocery store.

Unfortunately, the dishwasher is NOT magnetic.  So I had to improvise. 


Yes, its on my microwave.  The man doesn't see the problem with this.  I tried to explain and he laughed at me.  Ladies, you agree with me- everyone is going to think my microwave is dirty!


Oh well, at least I can disprove that theory by making them open it.  And we won't have any more "What do you mean they were dirty!?" discussions.  If we remember to turn it.

Saturday, April 14, 2012

Jewelry Frame

I am posting this for you, Net, since I keep forgetting to send you the pictures!

A while back (months if I know me, my thoughts need time to fester grow) I saw a picture where some innovative lady had taken a picture frame and cuphooks and combined them to make a fantastic jewelry hanger.  She took little pieces of wood and made a lattice inside the frame to designate space for bracelets and earrings and covered it like a medicine cabinet.  It was a breathtaking piece and amazingly detailed.  I desired it. 

But I'm lazier.

In March, on my birthday in fact, I made a great find at Hobby Lobby.  I discovered a plain, unpainted stretching frame on clearance for $17.00.  (Normally around $80!) Since it was my birthday I decided to buy it, paint it, and hang all my silly necklaces.  That week I painted it a great country blue (2 coats, no cat hair!) and sat it aside to work on something else.  There it stayed for over a month, lonely and blue.  (Sorry, couldn't resist!)

Last week I found the perfect cuphooks and couldn't wait, I screwed 'em on (and of course I didn't have enough and have to order more) and hung the frame on the wall in my bedroom.  It never occurred to me to take pictures, so I am afraid there is only verbal documentation.  As beautiful as it was I realized something was missing- earrings!  I love matching necklaces and earrings.  So this week I went to Home Depot and purchased a length of chain to hang on the bottom!  The final result is nearly perfect!

The chain is a little long for the board but the dangly bits give it character.  I can't wait to get the rest of the hooks so I can space the necklaces out some! 

I did hang some bracelets up too, the ones with clasps.  Still have a plastic basket on my dresser with stretchy (and not stretchy!) loopy braclets.  At least they don't tangle up like the necklaces did.  And yes, I did have everything, necklaces, earrings, bracelets and the occasional hair tie in the same basket.  Wretched tangly nightmare in the morning so I usually went without wearing anything.  Getting to pick out the perfect accessories is fantastic.  Don't you just love functional wall art? 

Backroom Odyssey

For ages now I have been avoiding something.  I firmly pretended it was fine and nothing at all was strange in my behavior.  The time has come to give in, however, so today I cleaned by backroom. 

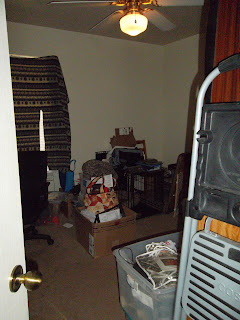
Storage?  Nope, my spare bedroom.
A very long time ago, this room was my office. I had bookshelves, a desk and lots of space.  This very messy, disorganized area was once sparkling and became my haven from the world.  Then, I got a roommate and had to give it up for about six months.  Afterwards I never bothered to clean it up again.  It was worse than this at one point, so full of things that it felt like a warehouse- there was a tiny path to the dogs kennel and my office chair, but everything else was full of boxes!  The boxes are now in the closet (most of them), but the amount of clutter in here couldn't be rivaled by many antique stores.

Something had to be done.

I decided that today was the day, that I could stand it no longer.  At 11:00, I began.  Late, I know, but hey, Saturday is the only day I get to sleep in!

I started with the desk.  It's where I spend most of my time anyway, but the usable space had shrunk to the tiny bit immediately in front of the monitor.  The pen cup was inaccessible behind the speakers, one speaker was on the floor behind the desk, loose dvds and cds littered the bookshelves and desk shelves, and random papers stuffed every available nook.  Nearly three years worth of junk all crammed together, breeding. 


After I started, I lost track of time.  Initially I was just cleaning the desk and the bookshelf, but once I began I couldn't stop!  Worse than craving Pringles was my need to clean this darn room!  Besides the desk there were other problem areas- mainly the floor!
The kennel was covered, the dresser boxed in, and my craft supplies heaped in box after box. 

Somewhere in these pictures are my entire yarn stash, all my beading supplies, four sewing projects, the sewing machine, and three boxes of random craft stuff.

I worked hard.  The desk was cleared of everything, shelves and drawers emptied and dusted.  As I cleared it I sorted junk into separate boxes- things that don't belong in here, random papers, craft supplies, office supplies, and garbage.  Once the desk was unearthed I turned right and began going through the boxes on the floor.  Half were filled with random things and became emptied as I sorted them into the proper containers.  Most of the boxes covering the kennel turned out to be shirt boxes, empty and waiting for Christmas.  I broke them down and put them in the closet, along with 6 other random boxes floating around the room.  I vacuumed, shifted the filing cabinet beside the desk, moved the kennel (and vacuumed it, darn Shitzu sheds like crazy when he isn't shaved!) and then decided to move the bookshelf.  Sadly, it did not survive the move.  Well, not as a whole . . .

For whatever reason, insanity I presume, some bookshelf manufacturers make them in two pieces that you stack.  When it was first built this bookshelf was very sturdy.  Four years of being overweighted and ignored were enough to cause the connectors to shift.  As I slid it diagonally away from the wall the center bent away from me.  The panicky squeak in my voice brought the man right away (he spent the afternoon at the kitchen table writing a term paper).  He decided to lay it down and slide it outside, determining that it was dead.  As he did so, the top detached and the bottom . . . disintegrated. Not a single piece of five was still attached to another.  I was laughing too hard to take a picture of that (it was amusing, it fell apart just outside the front door!), but I did manage to salvage the top. 

Luckily the mishap with the bookshelf was the worst offender.  I untangled two boxes of random electronics (cables and powercords must grow like pea vines, all in curlicues and tangles) and vacuumed again.  Finally, a room with room in it!


Now that the room is clean I have learned many things.

1) Use heavy duty trashbags or you'll be picking up again going down the hall.
2) The cat is not a help but will back down things in boxes.
3) Water cups should not be below a shelf you are dusting.
4) There are never enough plastic totes.

Tomorrow I am going through the craft supplies and reorganizing them.  That's the double stack of boxes next to the shelf with the lamp on it.  Plus about half my bedroom closet.  Weee!

Reflections on Morning Musings

This morning as I lay awake listening to the overweight cat beg for food I thought of the perfect first blog post.  I wrote it out in my head and repeated it several times, lying to myself about my ability to remember it.  The words flowed, the cadence was perfect!  There was humor, linguistic skill, deft phrasing!  And its gone because I got up to feed the cat.

Now this sounds like an overstatement.  It doesn't take that long to feed him, honestly, I just have to avoid tripping over him every half a second in the three feet between the bedroom and the bathroom, prevent him from knocking over the container while I scoop his meal and pour it into the bowl around his head as he tried to eat it before it leaves the scoop.  Every day, morning and night when I feed him we have this ritual.  It wouldn't bother me, except when the man feeds him the cat stays on the floor until the food is in the bowl. 

So my first blog post, instead of revolving around my thoughts for the blog in its entirety, will showcase the random thoughts that flood my mind when I am half asleep.  This morning's wisdom of the day?  Children don't respect their mother. 

Picking up pieces of kitty food and bouncing them off of Bosco's (cat) head, I reflected on this.  His purr reverberated through the bathroom, deafening me as I pondered how I let the fuzzy feline walk all over me.  The he looks up from his food, walks across the counter and headbutts me, right over my heart, and purrs louder.  I stopped wondering.